Networking | Linux | FOSS | Note-Keeping |

Pages

Showing posts with label UNetLab. Show all posts

Wednesday, March 7, 2018

Unable to login via HTML5 console on EVE-NG

Issue:
Unable to login via HTML5 console on EVE-NG's Web GUI after upgrade to EVE-NG 2.0.3-86 or when in HTML5 console, disconnect button gets you into a guacamole login page and can’t get any sessions in HTML5.

Solution:

This is a typical corrupt Guacamole SQL database issue; whether happened randomly or even during/after eve upgrade process, there are two very simple proposed solutions for this problem:
  1. Logout/Login from/into eve to be able to open html console again.
    or
  2. Issue the following command on eve-ng vm:
    #cat /opt/unetlab/schema/guacamole-update.sql | mysql -u root --password=eve-ng guacdb
    and than login/logout from/into eve.
HTH,
Rana Tauqeer.
Share:

Setting SecureCRT as default telnet handler for EVE-NG devices on Firefox.

While doing Lab practice on EVE-NG's Web GUI on Firefox Web-browser, telnet (by double click or right-click console option) to a network device opens Ubuntu's default terminal (Gnome Terminal) via 'xdg-open' script from 'xdg-utils' by default. Console to multiple devices opens a new instance of Gnome Terminal for each telnet session, which for me is not handy and makes it too messy! 

I'm rather a SecureCRT fan, and have always preferred it over other available terminal emulators due to it's awesome features and handy tools. So, I was trying to find a way to open the EVE-NG's telnet:// or ssh:// links directly via SecureCRT. Manual telnet/SSH from SecureCRT to EVE-NG's devices works fine by default, but, this becomes hectic for full scale CCIE Labs having over 50 or more devices running.


With the help of VanDyke Technical Support, I was able to figure out a way to get Firefox on Ubuntu to prompt you for which application to open SSH/Telnet links with.


Following instructions can make it possible:

  • Open Firefox and type “about:config” in address bar.
  • Create a new Boolean preference (right click on an empty space), name it
    network.protocol-handler.expose.telnet” (without inverted commas) for telnet handler, and set the value “false”.
  • Create another new Boolean preference (right click on an empty space), name it
    network.protocol-handler.expose.ssh” (without inverted commas) for ssh handler, and set the value “false
  • Restart the browser.
This should be enough for Firefox to let us select an external application to open “telnet://” links. 
While testing I would suggest leaving the "Remember my choice for ..." option unchecked. When prompted you should be able to select SecureCRT, by default it is located at /usr/bin/SecureCRT.

PS:

I'm using latest SecureCRT 8.3.2 on Ubuntu 16.04.4 LTS (Xenial) and while attempting various suggested workarounds, messed up SecureCRT's Tab feature (it kept opening new sessions in new instances rather than in tabs).

There is a work around that you could try. It would force SecureCRT into Single Instance mode, though you would not be able to open two separate instances of SecureCRT.


To accomplish this:

  • Locate the config folder info in the General / Configuration Paths category of SecureCRT's Global Options
  • Close all instances of SecureCRT/FX
  • Navigate to your SecureCRT configuration folder
  • Locate and open the Global.ini file
  • Find the line containing "Single Instance"
  • Modify the line to D:"Single Instance"=00000001
  • Save the changes to Global.ini
Now that SecureCRT is in Single Instance mode any link selected should open in a new tab.

HTH,

Rana Tauqeer.

Share:

Saturday, May 27, 2017

Setting up EVE-NG (Emulated Virtual Environment-Next Generation)

I have been using UNetLab for my Cisco certifications Lab practices since long & it has been very useful, thanks to UnetLab developers for that! The same team built a new, improved, efficient, more powerful, and flexible emulation platform called EVE-NG(Emulated Virtual Environment-Next Generation) earlier this year. Some fellows have been asking me about issues regarding installation, setup tips & tweaks, running IOL, Cisco IOS images, IOSv, QEMU and other virtual machines etc., so, I am writing the tips & tricks to workaround easily using EVE-NG version '2.0.3-60' updated on April 14, 2017.


Setting up EVE-NG:

  • Download & install VMware Workstation Here
  • Download ready to go OVA ver 2.0.3-59 Here or the direct Mega download Link Here
  • Import the downloaded OVA in VMware Workstation by running VMware Workstation and select File -> Open - >browse & select downloaded OVA file named 'EVE Community Edition.ova' and press Open.

  • A new window will popup, press import.

  • Wait till the import is complete.

  • Now, change the newly imported virtual machine settings.

  • Change Memory (RAM) according to your available system resources, (more, the better) I have changed it to 4GB's of RAM for this test VM.

  • Change processor settings according to your system resources, following are the settings for my laptop. I have selsected 4,1.
    The most important thing is to also select "Virtualize Intel VT-x/EPT or AMD-v/RVI" option. DO NOT FORGET TO SELECT THIS.

  • Change the Network settings to "NAT"and press OK.

  • Now press "Upgrade this virtual machine", if you are using newer than VMware Workstation 10 versions. The default OVA settings are for VMware 10. Press Next.


  • Select the VMware Workstation version from the drop down menu. I'm using VMware Workstation version 12, so select version 12 and press Next.


  • Select "Alter this virtual machine" and press Next

  • Press Finish.
  • After the virtual machine conversion is complete, press Close.
  • Now, the virtual machine is ready to be turned on. Press "Power on this virtual Machine".
     
  • Login with username "root" and password "eve"


  • Now, a new window will pop up, type the root password, press OK, and than retype and press OK.

  • Here you can assign a short name for the virtual machine, change it to your desire or leave it as default and press OK.

  • Change the domain name or leave it to default and press OK.

  • The default network settings are to use dhcp, it is recommended to use a static IP address for management, so use down arrow, press space bar key to select static, and press OK.

  • Type the management IP address here by looking at the virtual network adapter settings, and press OK

  • Type Subnet Mask and press OK.

  • Type the default Gateway address, do not use the first IP address of the range as it is used by VMware, so type the second IP address of the range.

  • Type the Primary DNS Server address, and press OK.

  • Type Secondary DNS Server address(I am using 8.8.8.8), and press OK.

  • Type NTP Server address or leave empty if you don't wish clock sync, and press OK.

  • Choose the connection type, if you're not using any proxy than just press OK.

  • After this, the VM will reboot itself and you'll be prompted with the login, password prompt. Type username & password.
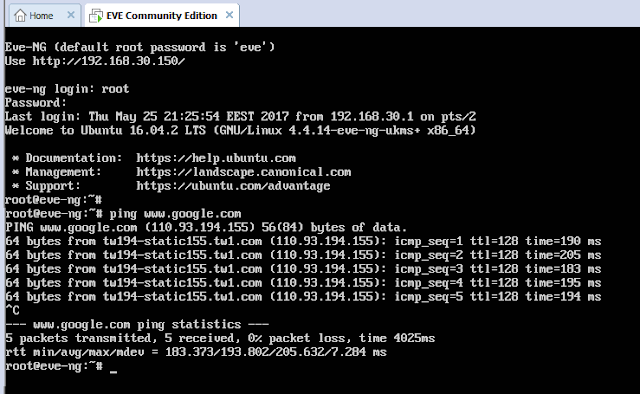
  • It is important to check internet connectivity by pinging any internet address, so that we may be able to download EVE-NG future updates and other packages later.


Now EVE-NG is ready to be accessed, pointing the browser to the management address (previously configured) will open a username password prompt. The web default user is "admin" with the password "eve". Login with the credentials and witness the GUI, different menus and features. Just go through the menus and you will get familiar with all available features.


HTH.
Rana Tauqeer.

Share:

Sitemap

Contact Form

Name

Email *

Message *

Total Pageviews

Search This Blog